We all know how intimidating macarons can be to make, and perfecting these dainty and delightful morsels can often take weeks, months, or even years of practice. That’s why we’ve compiled a a few helpful hints that are worth keeping in your apron pocket.
Want to learn more about perfecting macarons, or simply looking for a delectable recipe? A Savour Online Classes subscription provides you with both, plus so much more!
1. Weigh every single ingredient.
Macarons are extremely finicky, and the slightest misstep can ruin your batch. So, it’s essential to accurately weigh and measure all the ingredients that will be included in your macaron mix for consistency across the board. Simply using a standard kitchen scale will help you on your way.
2. Refine your almond meal.
A great almond meal can be the cornerstone of a perfect macaron. To ensure your almond meal is processed to perfection, make your own almond meal by grounding whole almonds in a Robot Coupe or a good quality food processor. Alternatively, you can purchase almond meal ready ground and refine it down in a food processor. As almond meal is too coarse for macarons, even commercially ground almond meal needs to be refined further for it to be suitable.
As another option, you can buy almond flour which is ready to use straight away.

3. Give your egg-whites some time to age.
Nobody likes to age but your egg-whites most certainly do. Ageing your egg-whites will help reduce the moisture content in your mix and help when whipping. Crack your egg whites at least one day or even up to a week prior to making your macarons. If you have a consistent room temperature, you can also leave the egg whites out of the fridge overnight.
4. Add cream of tartar.
Sounds like an old wives tale, right? Wrong. Adding cream of tartar to the egg whites before whisking helps to stabilise the meringue and increase the overall volume. Leaving you with the ideal consistency for the meringue.
5. Slow and steady wins the race
When you start whisking the egg whites, you should start on a slow speed and gradually increase the speed. Why? Whisking on high speed and going full throttle at the start can create large air pockets inside your macarons that will expand during the baking process.
6. Use Bake Stable colour
When you’re at the fun stage of adding some personality to macarons, you should always use a bake stable food colouring. Avoid using water-based food colouring as they often ruin the consistency of a macaron mix and may leave you with a runny batter. For colouring her own macarons, Kirsten prefers to use AmeriColor Gel Paste.
7. Let the mixture settle.
During the mixing process, it’s important to stop at regular intervals to see if the mixture is slowly starting to level out in the bowl. Step back and admire how far you’ve come! It should be slow to level out in the bowl and take a full two minutes to complete this process.
8. Give your macarons their downtime.
Once your French meringue macarons are piped and looking plush, it is important to let them sit out for 30 minutes before baking in a dry and cool place. This will allow the macarons to form a beautiful skin on top that will blossom in the oven. If you’re making Italian meringue macarons, they can be immediately placed into the oven.
9. Bake on baking mats.
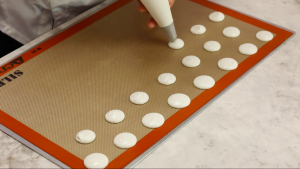
It may sound elementary but always bake on a silicon baking mat. Parchment paper or baking paper is silicon coated on both sides to make it non-stick. Because of this double-sided coating, it’s prone to distort the shape of your macarons. And no one likes a lopsided macaron!
10. Store them in the fridge overnight.
The humble fridge can be your macarons most loyal friend, so leave them overnight in the fridge within an airtight container. The purpose of this is that the moisture in the fridge will break down the interior structure of the macaron shell, creating a beautiful chewy sensation and leaving a gorgeous outer crust.
All this macaron talk has you inspired? Join Savour Online Classes today to master Kirsten’s entire range of spectacular macaron creations with easy-to-follow recipes and step-by-step tutorials!
