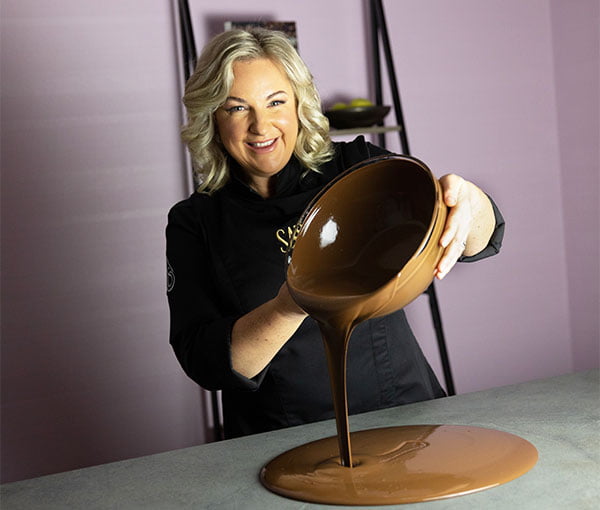


Entering the kitchen is one of the most exciting experiences. There’s an infinite number of recipes, methods and ingredients at your disposal and the opportunities to create something spectacular are endless!
Whether you’re an experienced professional or a newbie in the kitchen, the feeling you get from creating a delectable treat to share with family and friends, is to me what makes chocolate and patisserie so rewarding.
So, to settle the excitement and ease those few little nerves, I’ve compiled nine great tips to help you on your way to ultimate baking prowess.
1. Invest in the right equipment.

Brand spanking, shiny new equipment… I mean, who doesn’t love to shop! Although when you’re starting out, it’s difficult to know what equipment you require, and with a whole category of items to choose from, you might need a few friendly tips from an industry expert like myself. So, here’s four pieces of equipment that I absolutely can’t live without:
Kirsten’s Equipment Essentials
- A set of Digital Scales – Battery-operated are fine and always check that they weigh in either one-or two-gram increments.
- A Digital Thermometer – It doesn’t have to be expensive, but it can take a lot of guessing out of your pastry work.
- Disposable Piping Bags – They’re great to have on hand and are ultra-hygienic.
- A Plain Round Piping Nozzle and a Star Piping nozzle – They’re amazingly versatile and the creative applications are endless.
We also have a Savour Online Class called “Where to Start – Equipment”, which is another extremely helpful resource!
2. What ingredients do I begin with?
It’s a question that’s asked frequently by newcomers, so to take the guesswork out, I’ve compiled a quick and easy shopping list of ingredients for you to take straight to the store. Similar to our “Where to Start – Equipment” class, we also have a “Where to Start – Ingredients” class that helps you get the ball rolling.
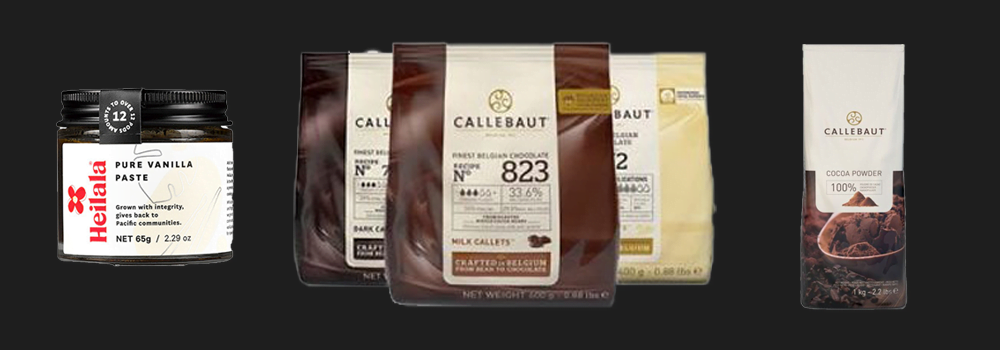
Kirsten’s Recommended Pantry Staples
- White, milk and dark chocolate (I recommend Callebaut couverture chocolate, it’s the finest quality chocolate you’ll find and tastes amazing)
- A good–quality processed cocoa powder
- Gelatine
- Vanilla bean paste
- 35% fat cream
- Almond meal
- Unsalted butter
3. Keep an open mind.
Be open to learning everything and have fun doing it! – I know it sounds utterly cliché, but it is true. As you dive into recipe after recipe, you’ll come across a variety of wonderful methods, so where it’s possible, try different techniques and see what works best for you.
Be patient with yourself and don’t freak out if one recipe states something different from the other, this is all just part of the process. And take note of the age-old saying; practice makes perfect! Repeating techniques, again and again will help you master them well and truly.
4. Break down the recipe.
When your first embarking on a recipe, a great tip is to break down the stages. Read through the instructions, step by step and see what elements you can make in advance.
Some elements in recipes can be made ahead of time and be stored at room temperature, chilled or frozen – so take full advantage when the opportunity is there! You’ll have a little more time up the sleeve and the recipes will seem like a breeze if you can split it up over a day or two.
5. Get to know your oven.
Now when we say this, we don’t mean taking it out on a date or asking it five quick-fire questions. But it’s practical to know the ins and outs of your home oven and how it operates. Do a little digging and find out if your oven is a convection or conventional oven.
Keep in mind however, that every oven is different, regardless of whether it’s a convention or convection. A good tip is to inspect your oven 5 mins before the timer ends. This way you’ll be able to work out if your oven is a quick mover or a slow burner.
Hint: Conventional or traditional ovens are usually set at 10-20 degrees higher than convection/fan forced ovens.
6. Work with room temperature eggs.
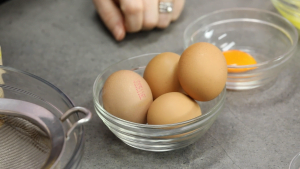
Eggs are used in so many different applications and they’re incredibly versatile, so I guarantee these next tips will be super helpful in the long run.
Always use eggs that have been stored at room temperature! People often query why their cake batter may have curdled and a lot of the time it’s because they’re not working with room temperature eggs.
It’s a simple and worthwhile tip to take your eggs out of the fridge a couple hours before you plan to work with them. Or for an even better result, warm them in a water bath until they reach body temperature.
Also, by storing egg whites at room temperature, you’re destined to get a better aeration and superior whipped egg whites with extra volume.
7. Know how to fix a split ganache.
You’re going to come across a luscious ganache recipe sooner or later, so it’s handy to know what to do if it all goes up split creek. If the fat and water aren’t balanced, your ganache will be prone to splitting and will look quite grainy.
Tip 1: It’s also likely to split if you have mixed it too much. Yes, we know it’s therapeutic, but go easy with the whisk! If the water and fat percentages aren’t balanced, the same result will likely occur. You might be thinking that you didn’t add any water… BUT cream contains 60 to 65% water, so always keep that in the front of your mind when mixing your ganache.
Tip2: If your ganache splits before it goes cold, add a little bit of additional boiled cream to the mix.
8. How to make a great mousse.
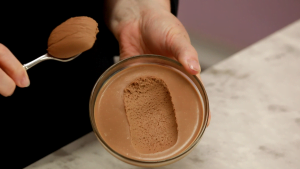
If you’re looking for a great beginner recipe, mousses can be the perfect treat to try your hand at. They’re super simple yet taste delicious!
A common mistake when making mousses is over-whipping the cream before you fold it through. By over-whipping your cream, you’ll split the mousse and you’ll end up with a grainy consistency. The same result will also occur if you let you cream sit at room temperature for too long before mixing into your mousse.
How to achieve ultimate mousse success
Semi-whip the cream to the point in which it has body, but still collapses when you scoop it up with a spoon. Then place the semi-whipped cream in the fridge until you are ready to incorporate it into your mousse.
9. Tips for a perfect pastry
If you’re looking to create some delicious and delectable tarts, knowing the tips and tricks to making a perfect pastry is the key!
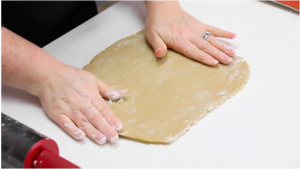
The steps to a perfect pastry
When rolling pastry, make sure it is well chilled before you start. Flour the bench surface evenly with a plain (all-purpose) flour. If you are making multiple tarts, only roll half of the pastry out a time.
Personally, I prefer a rolling pin with ball bearings, so the handle moves separately from the roller. (Don’t submerge these in water, it will rust).
Lightly dust your bench and pastry surface, and gently roll it slowly – don’t try and bludgeon it into form. With every two or three rolls, gently change the position of your pastry on the bench and lightly dust with more flour if needed (I won’t ever talk to you again if you flip it over).
Finally, roll it to your desired thickness, keeping in mind that the pastry will rise slightly when it’s baked.
An extra special tip:
Don’t give up.
This might be the most important tip yet! Learning a new skill takes time and you are bound to be met by a few challenges. Mistakes in the kitchen can be deflating but rest assured, these mistakes will only help you grow and develop your craft.
Creating sensational treats and exceeding your own expectations will bring you the greatest joy. So, stick to it and put time into your hobby – I can promise you, the finished result will be well worth it.